Yesterday, Windows 10 was released. I’ve been working with it through the preview stage and I think Windows 10 has covered a lot of issues that gave Windows 8 such a bad wrap. One very important feature is that Microsoft is offering a FREE upgrade to anybody with Windows 7 or Windows 8.1 for the next year. I finished the upgrade yesterday and here are a few essential things you should know.
Skip the “In App” Update
While I’ve seen the tray icon to reserve my free copy of Windows 10, that isn’t the only means of getting your free upgrade. Instead, go download the ISO file (which is essentially the DVD) from the Microsoft site. When you double click on the file, it will “mount” the file just as if you were putting a DVD into your computer and will run the upgrade process, downloading any additional updates you may need along the way.
There are several advantages to this. If you have multiple computers you need to update, you’re only doing a massive download once (it’s nearly 4 GB in size). Simply copy the ISO to a USB key, copy it to another machine, and start another upgrade. In addition, this is a complete Windows 10 disc, meaning if you want to do a fresh install, you can boot this ISO off a USB key and install that way. You’ll need a Windows 10 product key if you do it this way. Having a full image gives you a lot more options down the road.
Roll Back if You Don’t Like It
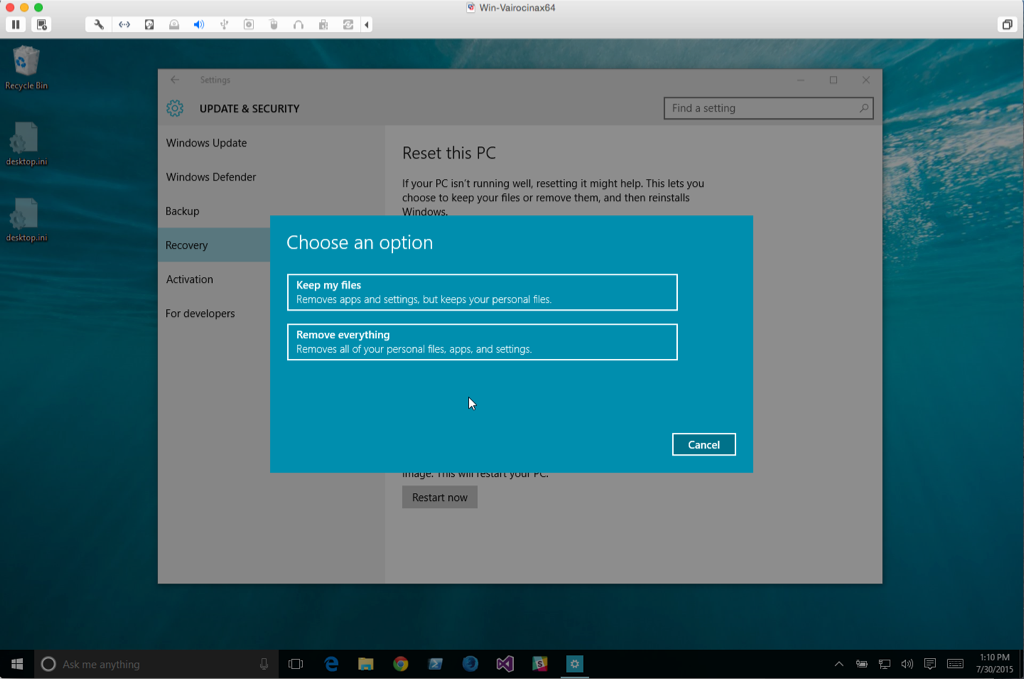
After upgrading, I started digging around the recovery settings and found this nice screen.
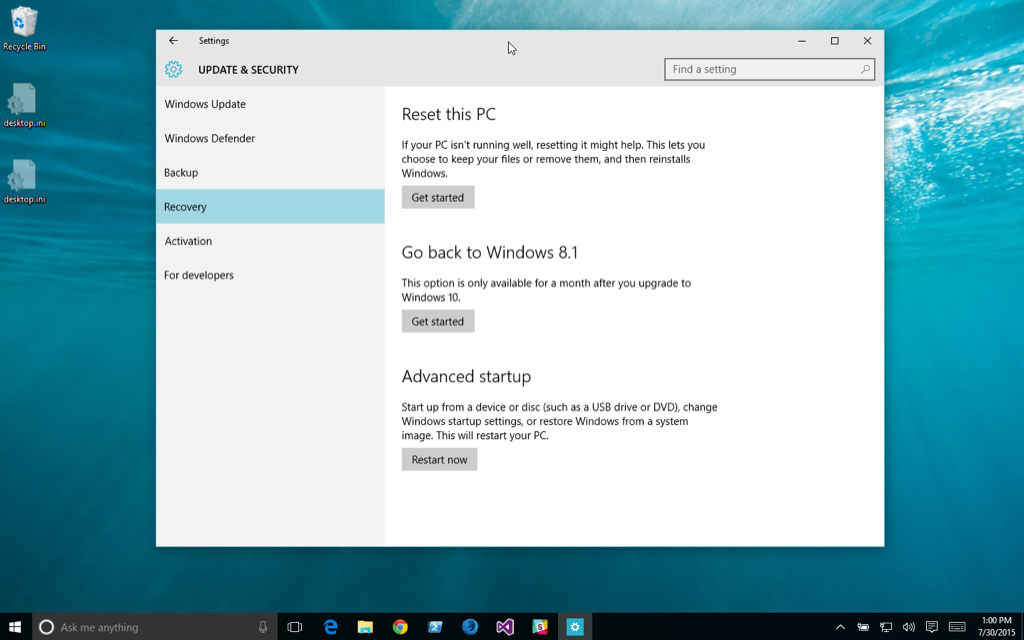
After doing a little more reading online, I found out that the Windows 10 upgrade process is a little different from the past. The upgrade is effectively giving you a clean install of Windows 10 by moving all the old operating system files to a separate folder, putting in the new operating system, and then merging in any documents or applications you have installed, if you choose to keep them. This is a lot better than the “patchy” upgrades that I’ve gone through (and now completely avoid) in the past.
There’s another perk to this. For the first month after you upgrade, you can click that button to “go back” to your previous version of windows. I won’t be doing this myself, but it will reverse the process, and you can be back to the way you were before, with no issues.
EDIT: If you are happy with Windows 10 and don't plan on rolling back, you can delete the old Windows 8 files and save yourself about 15GB of space. Details on how to do that are found here.
A Clean Install Isn’t Available - Almost
My initial plan was to grab the ISO and do a fresh install of Windows 10, expecting to be able to use my existing Windows 8.1 key or something that acknowledged the free upgrade. Unfortunatley this was not possible. After installing, I tried to pull up an old tool that would display your activation key, expecting to have a “new” Win10 key that I had heard about, but that dind’t work either. Since the free upgrade is only available for a year, I suspect a clean install along these lines will not be possible.
However, as part of the new system recovery system, there is a way to do a “reset” of Windows 10 to a pure install and choose not to recover any of your files or apps that you have installed. This will give you a “clean” environment in which to work with, which could be just as close to the real deal.
Go Upgrade!
I’ve been quite happy with Windows 10, both during the preview phase and now that the full product is out. I’m really excited to see how the “convergence” features work when you’re swapping between tablet and laptop mode. Overall I think the sweet spot is there between the “classic” desktop/start menu experience and the benefits of the “metro” experience with live tiles. Only time will tell.
Having issues with the upgrade? Leave a note and hopefully we can work through it or get others to chime in.