While I’m no meteorologist, I’ve always been a bit of a weather junkie. I love tracking the conditions of the moment, seeing how they affect the weather, and even taking a stab at forecasting how things will be for tomorrow. However, I’ve never had a weather station in order to track things at my house, until now. Thanks to some early birthday money, I’m now marking an item off my bucket list and tracking my weather with an AcuRite 5-in-1 Pro Weather Station. Here’s the initial unboxing and thoughts.
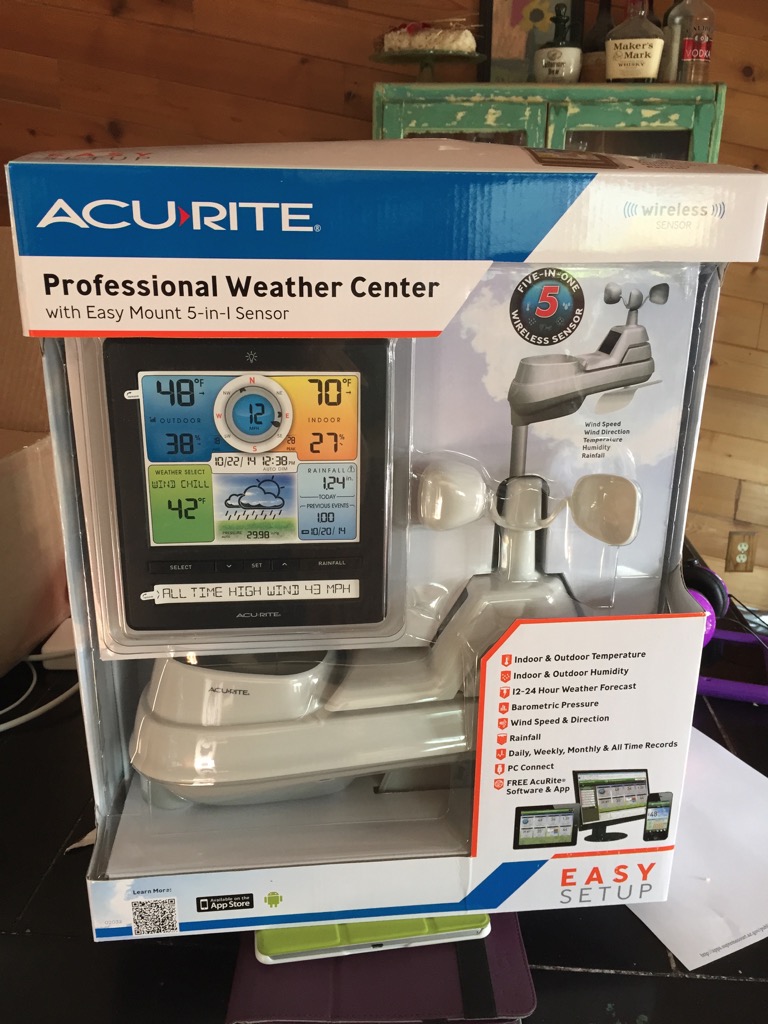
This lovely box showed up on Friday. The 5-in-1 Pro tracks temperature, barometric pressure, wind speed, wind direction, and rainfall in one handy sensor unit. The display has a color panel with LCD numbers, plus a USB connection to it if you want to connect to a computer and upload your data to a cloud site if your choice.
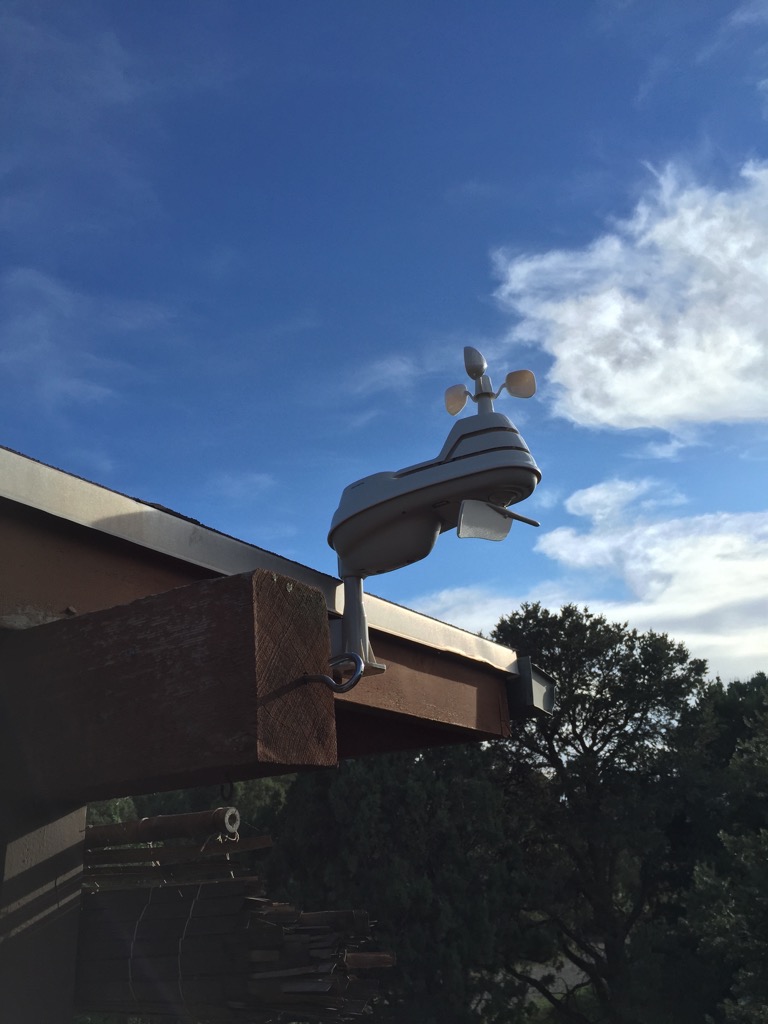
The trickiest part about installation is finding a place to install the sensor. Generally speaking you want to place the sensor at least 5 feet off the ground, and have it in a spot where the solar battery can point south and you can have it free from trees or direct solar reflection that can affect the temperature values. Fortunately for me, part of my deck is covered and the roof spot has a nice open area in which to install things. Install the batteries into the sensor and make sure the sensor and the display unit are set to the same broadcasting channel.
Simply drill the mounting pole into the base, and mount the sensor on the pole. You’ll want to make sure the solar panel is exposed to the south and that the bead level on the top is in the center. Then you add a couple screws to secure the sensor to the pole. I was able to get this one in about 20 minutes.

Once that is done, plug in your display unit and give it a few minutes. Soon the display unit will start getting data from the sensor.

That’s all there is to it!!!
Currently the forecasting is in “learning” mode where it will take all of the local data that it collects and after two weeks will be able to start forecasting the local weather within 12 to 24 hours. After a month they say it is pretty well established. My favorite features are the ticker at the bottom, which displays various weather messages and statistics (such as high/low temp/wind/rain/etc. as well as the moon cycles. I find myself checking out the wind speed and how it affects the “feels like” display constantly. I missed the rainstorms we had last week, but I’m hoping the monsoon rolls through again soon to check the rain collection. 8^D
Some of the online reviews have complained about the LCD panel not being a true color LCD and just backlit color plastic. In my opinion I find the display quite clear and there’s no issues whatsoever. My temperature readings seem a little bit higher than some of the other weather underground stations in town. However, my house is on a hill which is a bit more exposed, so that could account for the warmer temperatures, especially in the afternoon. Getting a simple thermometer and placing it there will help me verify. If the numbers are off, there is a nice calibration feature I can use.
I’ll follow up in a month or so once calibration is complete and we can really see things in action. If get some bonus bucket list items, I’ll pick up a Raspberry Pi and pull the data from the display unit and get my very own “circle” on the weather underground site. Here’s hoping!!!!