Nowadays, nearly every site out there is using SSL, and for good reason. Security is on the rise and adding a little bit of protection to your site traffic is a good thing. Additionally, having a nice consistency in URL naming between your dev/staging/production environment is very handy. Here's how you can set this up in Visual Studio and IIS Express.
Enable SSL
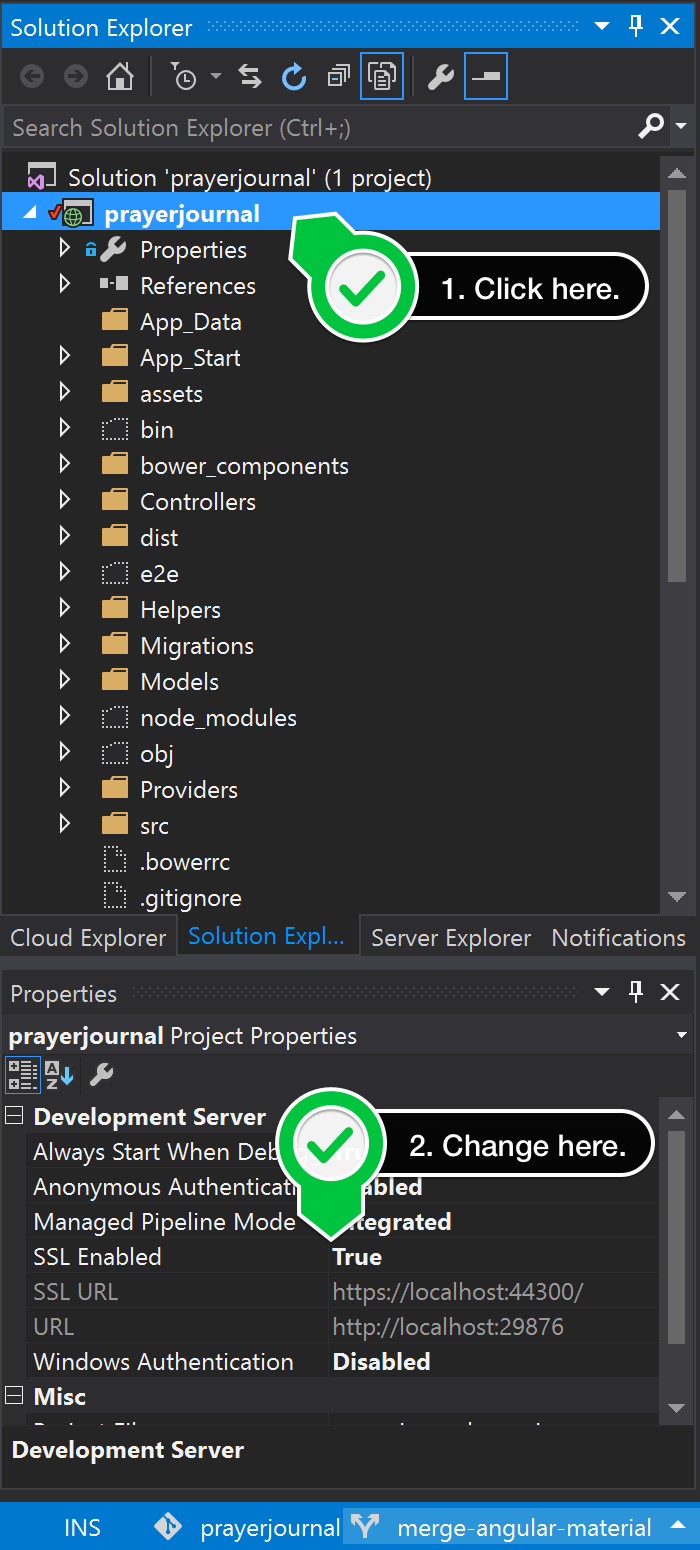
Starting with Visual Studio 2012, IIS Express became a first class citizen, and the recommended way for running your web apps locally through Visual Studio. Visual Studio took it one step further and made it "one click" simple to setup your web app to use SSL. Simply select your web app project, and press F4 to bring up the properties window. From there, change the option to enable SSL and say yes to any prompts that ask to install a certificate and create an exception rule.
After that, launch your site (good 'ol CTRL+F5 you...) and change your URL to check out your new SSL address. You may need to add an exception rule in your browser before seeing the site.
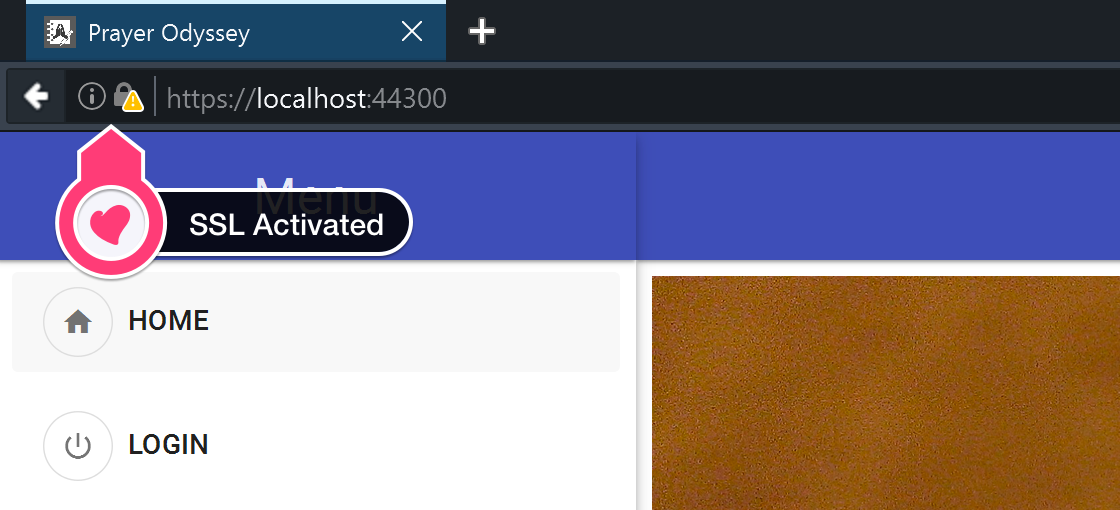
SSL has never been easier.
Setup Custom Domain
Custom domains take a little bit more work, due to the firewall and security permissions baked into Windows. But it isn't insurmountable. Here's the steps to accomplish this.
Add New Urls for IIS Express
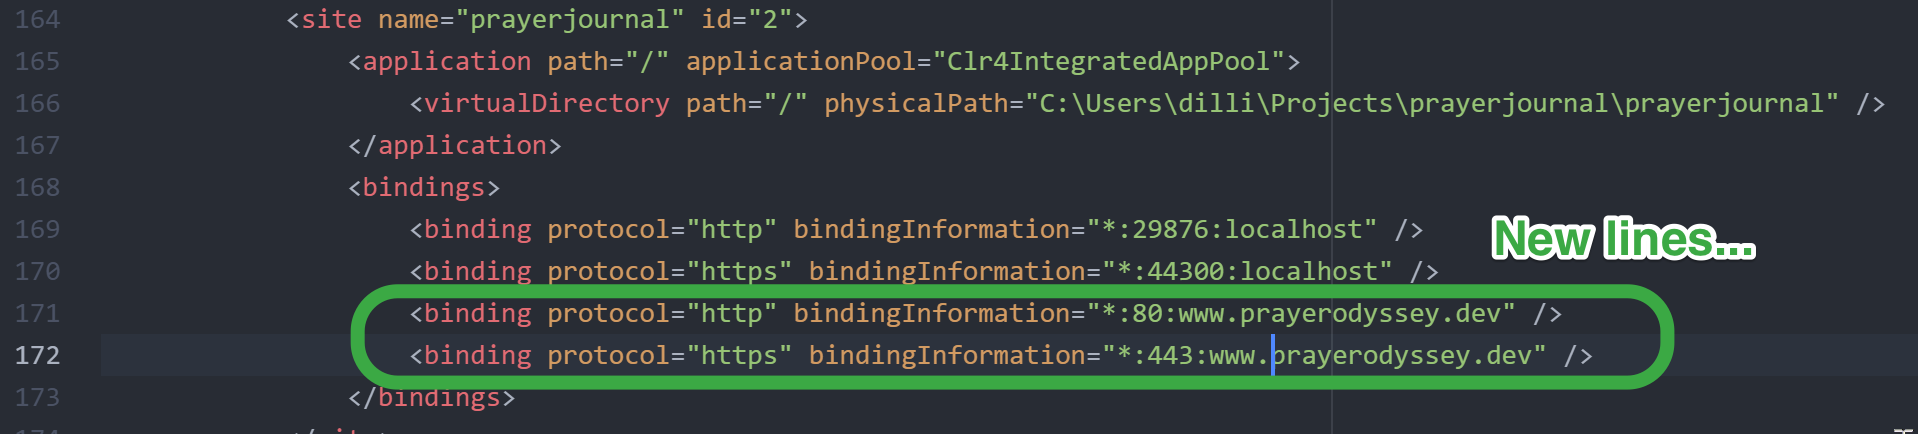
IIS Express uses a file named applicationhost.config to store the basic configuration details for your site. In Visual Studio 2012/2013, this is typically located in your Documents\IISExpress folder. However, in 2015, there is a .vs folder at the project solution level where this file is stored. If you open this file and scroll down a little, you'll see the bindings section where the default high number ports are listed. We want to add to lines right below that, using our custom domain, and to use the standard port 80/443 associated with websites. Your updated file will look something like this:
You'll also need to update your hosts file so that your custom domain points to the local 127.0.0.1 address. Otherwise the DNS will look "outside" and not find your custom URL.
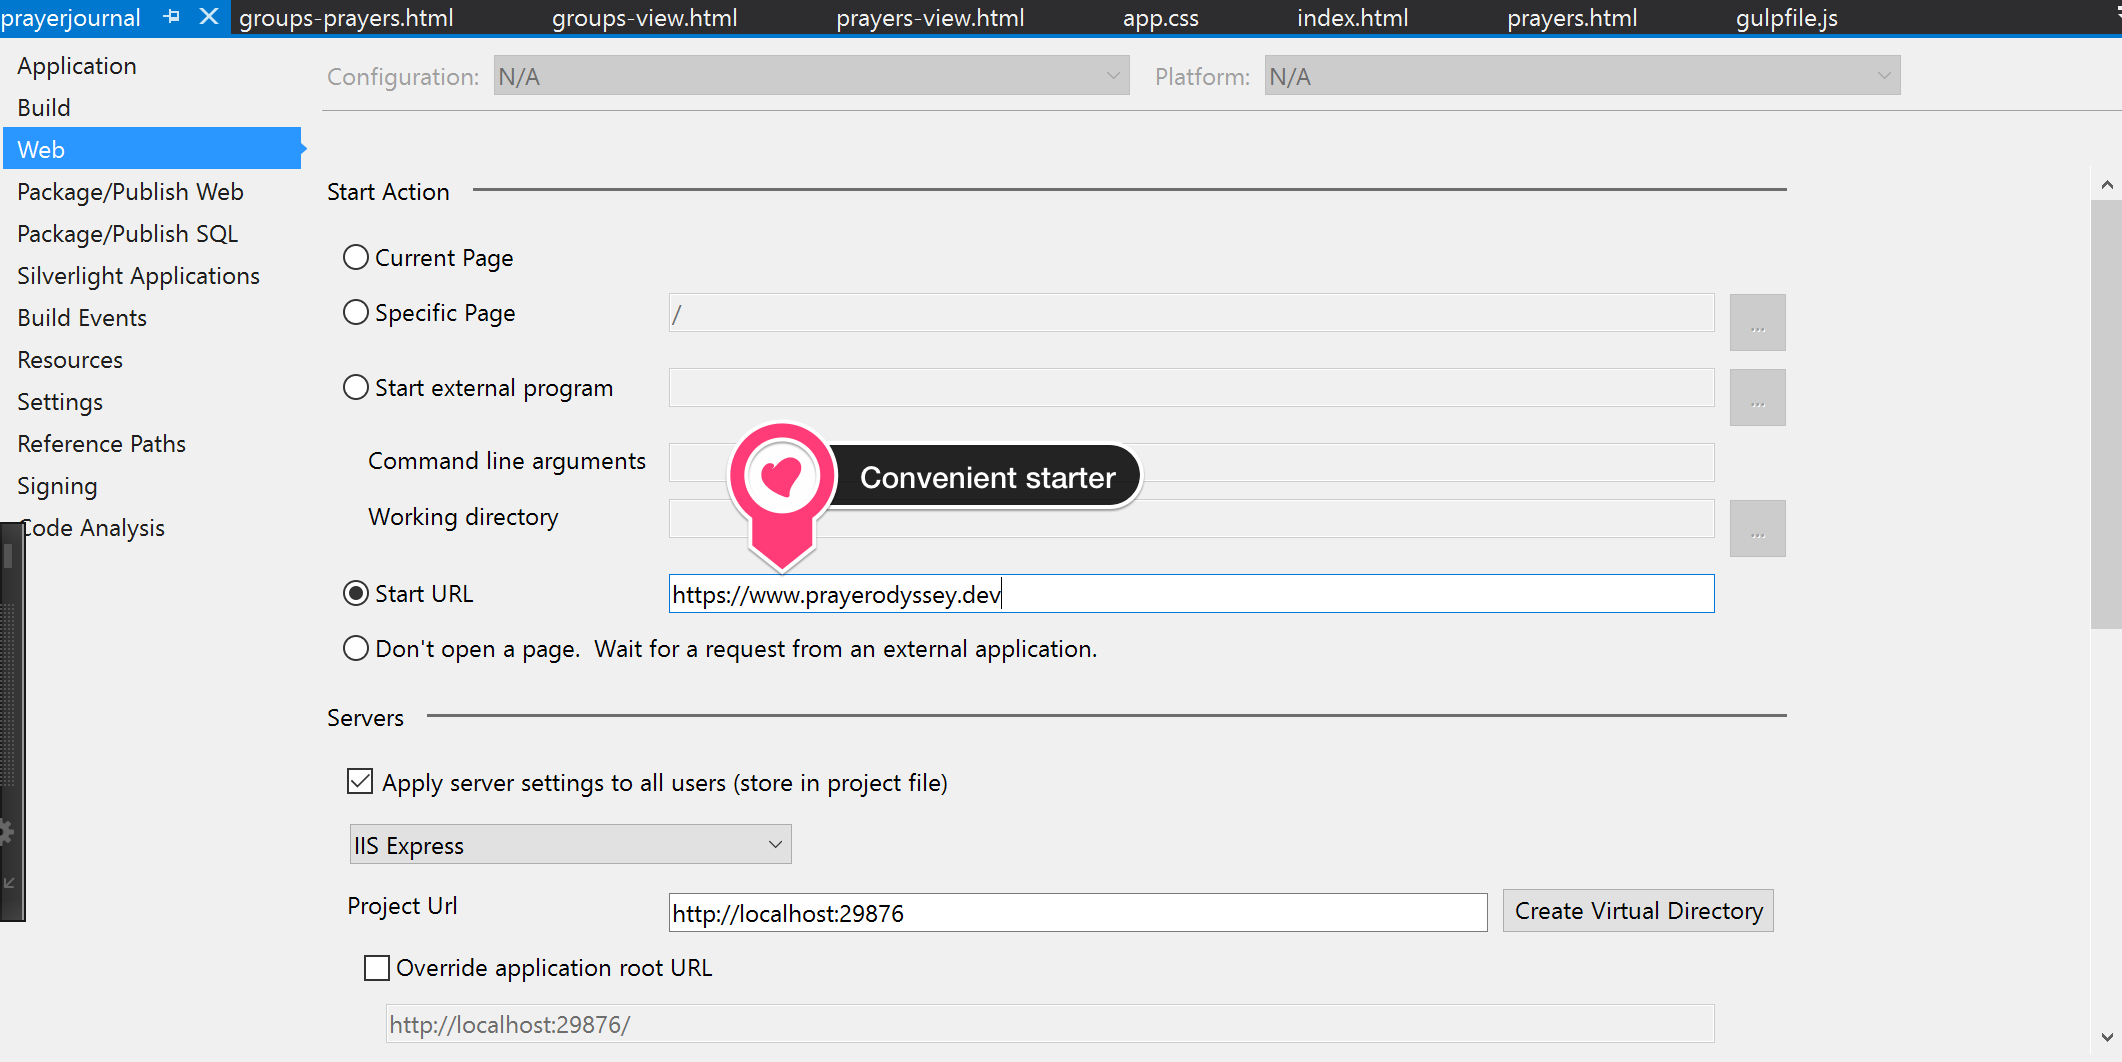
Once saved, IIS Express will now "listen" for those URLs/ports and serve your web app. Conveniently, I update my web app project settings to load my new custom URL whenever I launch it.
Add Security Exceptions
At this point, if you attempt to launch IIS Express again for your app, you may see some errors:
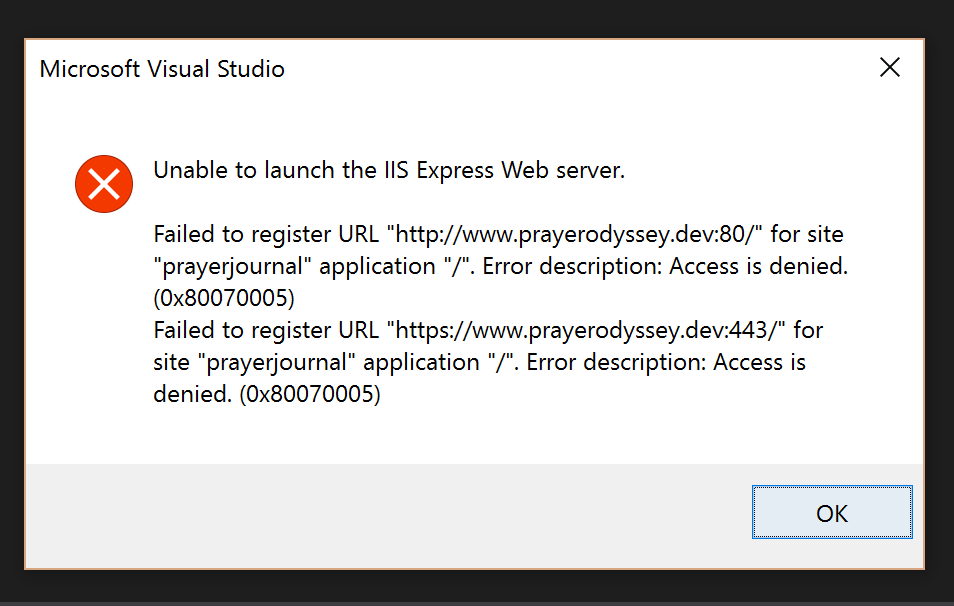
There are two things at play here. The first is that in order to run IIS Express on low number ports, you need to run Visual Studio as an Administrator. Yes, it is a slight annoyance, but you can configure your shortcut to always run as Administrator and move forward.
The second reason is that the Windows Firewall has blocked IIS Express from using the low number ports as well. To fix this, we need to add a couple of rules to the firewall access control list. Open up powershell and enter the following commands:
netsh
http add urlacl url=http://www.prayerodyssey.dev:80/ user=everyone http add urlacl url=https://www.prayerodyssey.dev:443/ user=everyone
quit
If you launch your web app now and navigate to your custom URL, you should be all set, except for one last thing, the SSL certificate.
Add SSL Certificate Configuration
When Visual Studio created a self signed certificate and linked it to IISExpress, it only did it for the high level ports (443000 to 44399). We need to add another SSL certificate entry to handle port 443. To do this, we need to track down the certificate hash and the application Id generated. To do this, execute the following command:
netsh http show sslcert > sslcert.txt
This will dump the details into a file. Open up the file and find the following values near the top of the file:

Using this information, we can add another entry for port 443 using the following commands:
netsh
http add sslcert ipport=0.0.0.0:443 certhash=6a0c09c25569a327e4c2739f7519c2692e9f2a2e appid={214124cd-d05b-4309-9af9-9caa44b2b74a}
quit
Don't forget to replace those values with the ones that match your file.
Run!
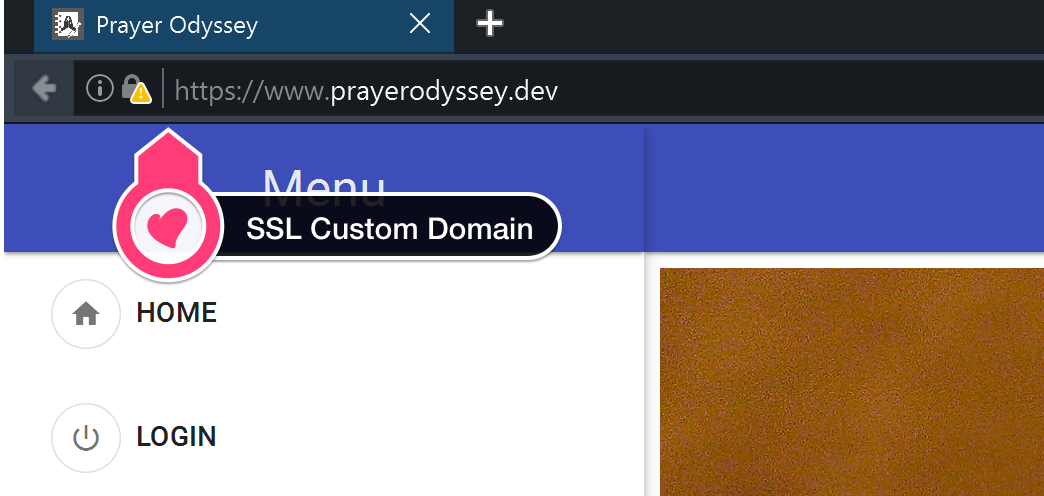
Once that is complete. Close IIS Express (if it is running) and launch your site again. You should now have your custom URL running over SSL for your site!
While this is a little tedious, it's about the same amount of work if you were to generate a SSL cert, update your apache configuration, update your hosts file, and everything else for a PHP based app. This will give you a closer "real" environment when developing locally, and can help you catch any pesky SSL or domain redirect issues you might not see when running as localhost.
Enjoy!!!