Note: This post comes as a HT to this StackOverflow question, I'm just tweaking a few things to accomodate for VSMMXII...
I'm working on a project to convert a PHP application to a .Net MVC application. The initial prototype has some nice bootstrap/highcharts functionality, so I want to preview the site locally as I'm migrating the code over. Instead of starting up or installing a new editor, I wanted to take advantage of IIS Express that comes with Visual Studio 2012 to run the app. It's really easy to setup and here's how to do it.
1. Download PHP
You can get a windows optimized version from http://windows.php.net. Following the documentation, make sure to get the Non-Thread Safe version since we're working with IIS. After downloading the file, extract it to your "C:\Program Files (x86)" folder or wherever you find convenient.
2. Map FastCGI to your PHP location
With previous versions of Visual Studio / IIS Express, you needed to update your configuration files, but with Visual Studio 2012, all of this has been taken care of for you! The only thing you need to do is let FastCGI know where your PHP executables are by running the following commands from the command prompt (not PowerShell):
[gist]5405986
Note that the quotes are specific to the command prompt. You may need to update your path to PHP depending on where you extracted it to.
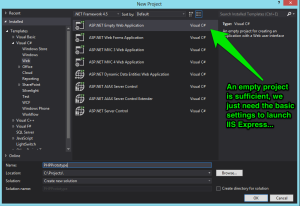
3. Create an Empty Visual Studio Web Application
Yes, this step sounds confusing, even if you already have your PHP site code. Visual Studio won't let you create a basic web application solution in an existing folder, so I create an empty Web Application project file.
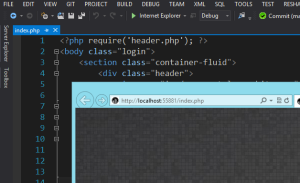
4. Add your PHP Files.
Once the project is created, copy all of your files into the project folder. Then, make sure your project is set to view all files, and click the refresh icon. You'll see all of your PHP files and you can right click on them and specify "Include in Project".

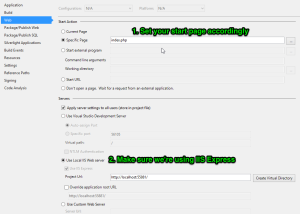
5. Configure Web Application Startup Parameters
The final step is to configure the startup parameters for your site. Right click on your project name in the Solutions Explorer, select "Properties", and then select the "Web" tab on the left hand side in the properties window. Change the "Start Action" option to be "Specific Page" and enter "index.php" or whatever your starting page needs to be. In addition, make sure that the "Servers" option is set to use the "Local IIS Web Server" and that IIS Express is selected. Make sure to save your options before closing the window.
6. Build and Run!
Technically there's nothing to build, but hit CTRL+F5 to start the project without debugging. This will launch IIS Express and start up your index file! You're all set. If you want you can use Visual Studio to edit your PHP code as needed, but without additional plugins, you won't have all the extra intellisense helpfulness.
Enjoy!