
Lately I've become a big fan of the Clementine music player. It's free. It has some great features. It's based off of the well known player Amarok and it has both Mac and PC versions. The one thing that it currently doesn't have is the ability to rip CDs to your collection. Actually you there IS a way to rip CDs in Clementine through the magic of ... no, not TV ... transcoding.
One of features I love about Clementine is the transcoding feature. This allows you to convert audio from one format or bitrate to another. When I first started ripping my audio CDs, I ripped them at 320k quality, since I had some extra hard disk space and wanted some high quality audio for down the road. However, when I post my audio for my podcasts, or want to transfer them to Fiver or Whister (my Droid and iPod Touch), the large file size becomes a problem. I now simply use the transcoding tool in Clementine, specify a lower bitrate (thus affecting size) and then I copy them over. We'll use a similar approach for our CDs in Clementine.
The first step is to put the CD in your computer. iTunes will most likely open and ask if you want to rip it, but for now we'll say no and quit out of iTunes. Once you quit, double click on your CD that appears on the desktop, and simply select all the tracks you want to rip, and drag them to your desktop, or any other place you find convenient. I typically take the time to create the artist/album folders in my Music directory and copy them over there.
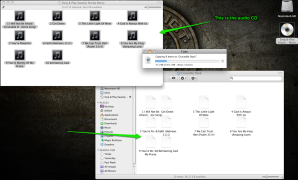
Once the copying is done, eject your CD, and start up Clementine. Select Tools->Transcode Music. This will bring up the transcoding window. Click the "Add" button and navigate to the folder you copied the files to.
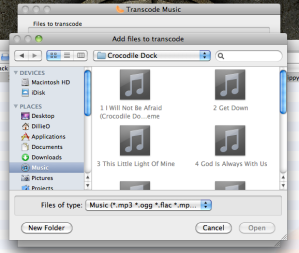
You'll need to change the "Files of type" option to "All Files (*)" in order to be able to select them. Once that has changed, select all the files, and click the "Open Button". You'll now see all of the music listed for transcoding. Click the "Options" button next to the Audio Format drop down list to specify your MP3 importing options.
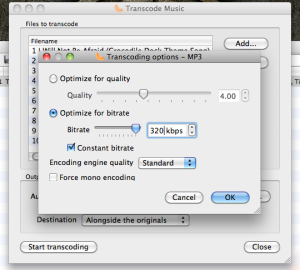
You'll notice that I'm specifying 320kbps for my transcoding. You can do whatever size you like. The "default" bitrate for transferring to most Android/iPhone devices is 128kbps and a "higher quality" recording is 192kpbs. Transcoding makes a copy of the file, so you can always keep a large bitrate on your computer and transcode later at a lower bitrate to your portable device. When you're comfortable with your settings, click the OK button. Note that there are plenty more encoding options available in the drop down list, including FLAC, Ogg Vorbis, WMV and more. MP3 is the most common format, but you audiofiles out there know there are plenty of options. Our destination is set to "Alongside the originals" and we can't change that. If we have our portable music device plugged in and recognized by Clementine, we should be able to transcode directly to it. That's something to keep in mind for later.
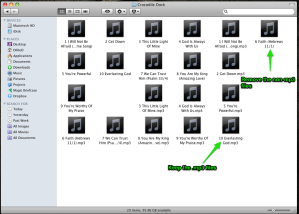
When you're all set, click the "Start transcoding" button to start the process. Depending on the number and length of your files, this could take a little time. Once your done, click the "Close" button and then quit out of Clementine. We have a little bit of cleanup to do. Go back to the folder you copied the CD files to and notice that your file count has doubled. Remove all the files that don't have .mp3 in their name.
Start up Clementine again, expand the "Smart Playlists" folder and select the "Newest tracks" playlist. Assuming that you have the library setup to autoscan every time it starts, you'll notice that your newly imported songs.
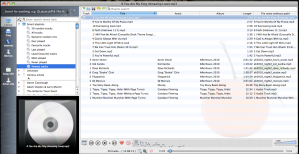
From here you can use the build in tag editor, or a separate tool (I really like Tagr) to fill out the rest of the information so it will fit nicely in your music library.
That's all there is to it! I know it takes a little more work than other apps, and I'm sure the developers for Clementine will add the functionality down the road, but this will get you by for now. I've done all of this on my Mac, but I'm sure the process is similar for a PC.
Enjoy!