Recently Microsoft announced that they will be working with the OpenSSH project to bring all of the SSH goodness natively into PowerShell. This is great news! In the meantime, here’s how you can run SSH (and Git) from PowerShell with only a little bit of effort.
Step 1: Install Chocolatey
The first step is to get the chocolately package manager installed if you haven’t done so already. Chocolatey makes it super easy to install the libraries we need, as well as a bunch of other things. Once installed, you’ll need to start up PowerShell as an administrator. For whatever reason you can’t install packages without being an admin. In addition, we’ll want to unrestrict our account so that we can run any PowerShell scripts we want. To do that we execute the following command at the prompt:
Set-ExecutionPolicy Unrestricted
When prompted, specify “A” (Yes to All) so that all scripts can be executed.
Step 2: Install Git / SSH Tools
Now that we have things ready, let’s install our tools. Enter the following one by one at the PowerShell prompt to install our tools:
choco install git choco install git-credential-winstore choco install poshgit
Those three tools are the core of what we need. By default git comes with the SSH tools needed for our basic operations, and poshgit gives us our Git commands available through PowerShell, so now all we need to do is get everything to talk to each other.
Step 3: Configure PowerShell Scripts
Since we're going to be running our own PowerShell scripts, we need to modify the security a little. Launch PowerShell as an Administrator and then enter the following command:
Set-ExecutionPolicy Unrestricted
You'll be asked to confirm this, and do so. After that you can close the PowerShell and continue.
There are two main scripts we need to register with our PowerShell session. The first one is the SSH agent utilities script. This is a set of functions that ties in the SSH executable installed with Git to be accessible from PowerShell. I take no credit for this one. Mark Embling did a fabulous job with this (6 years later and they still function fine) and you can get it here. Once you’ve downloaded the .ps1 file, save it to your {UserId}\Documents\WindowsPowerShell folder.
The second script is the one to add Git to your environment, register SSH Agent Utils, and get your PoshGit prompt running. You can save this script to a separate file and call it if you prefer, but I simply overwrite my existing Microsoft.PowerShell_profile.ps1 file with the following:
[gist]89145ed6636b76b6dd0a
There are two tweaks to make to this file.
The first is to check your git installation path. Depending on which version of Git you installed from chocolatey, you may have the 32bit or 64 bit version. If you have the 64 bit version, it will be installed into the “Program Files” (and not “Program Files x86”) folder. This script was originally configured for the 64 bit version, so if you have 32 bit change "Env:ProgramFiles” to "Env:ProgramFiles(x86)” on lines 2 and 3.
Finally, since chocolatey pulls the latest version of PoshGit with the install, the path to the example prompt file may have changed. Check your PoshGit installation. It will typically be in the C:\tools\poshgit folder. In there will be a dahlbyk-posh-git-XXXXXX folder. If the name of that folder doesn’t match what is on line 12 of the script, change accordingly, typically it is just the last segment of the folder name.
Now save the script and restart PowerShell. When you startup, you should see a comment about the SSH agent starting and the PID value for it. If something goes wrong, it is typically path related items that you can double check and resolve.
Step 4: Generate your SSH Key
The final step is to generate your SSH key. By default the SSH scripts look for a .ssh folder in the user’s home directory. If you haven’t done so yet, at the PowerShell prompt, execute the following commands:
mkdir ~/.ssh cd ~/.ssh ssh-keygen
This will create the hidden ssh folder in your user root directory, navigate there, and then execute the keygen utility to generate a key. Use the default on the key’s name/location and give it a password. Once done, you’ll see a fun randomized pattern. You’ll also have an id_rsa and id_rsa.pub file in the ssh folder.
For the final piece of magic, restart PowerShell. This time you will be prompted for the password for the SSH key you generated. Once verified, the SSH key will be “auto-authenticated” whenever you perform any git commands that require your SSH key for authentication. This lasts for the entire duration of the PowerShell session. With all the pulls, merges, and commits, it’s quite handy.
You’ll need to register your SSH key using the id_rsa.pub details with the repository provider you’re working with. Each one has documentation on how to set that up.
PoshGit in Action
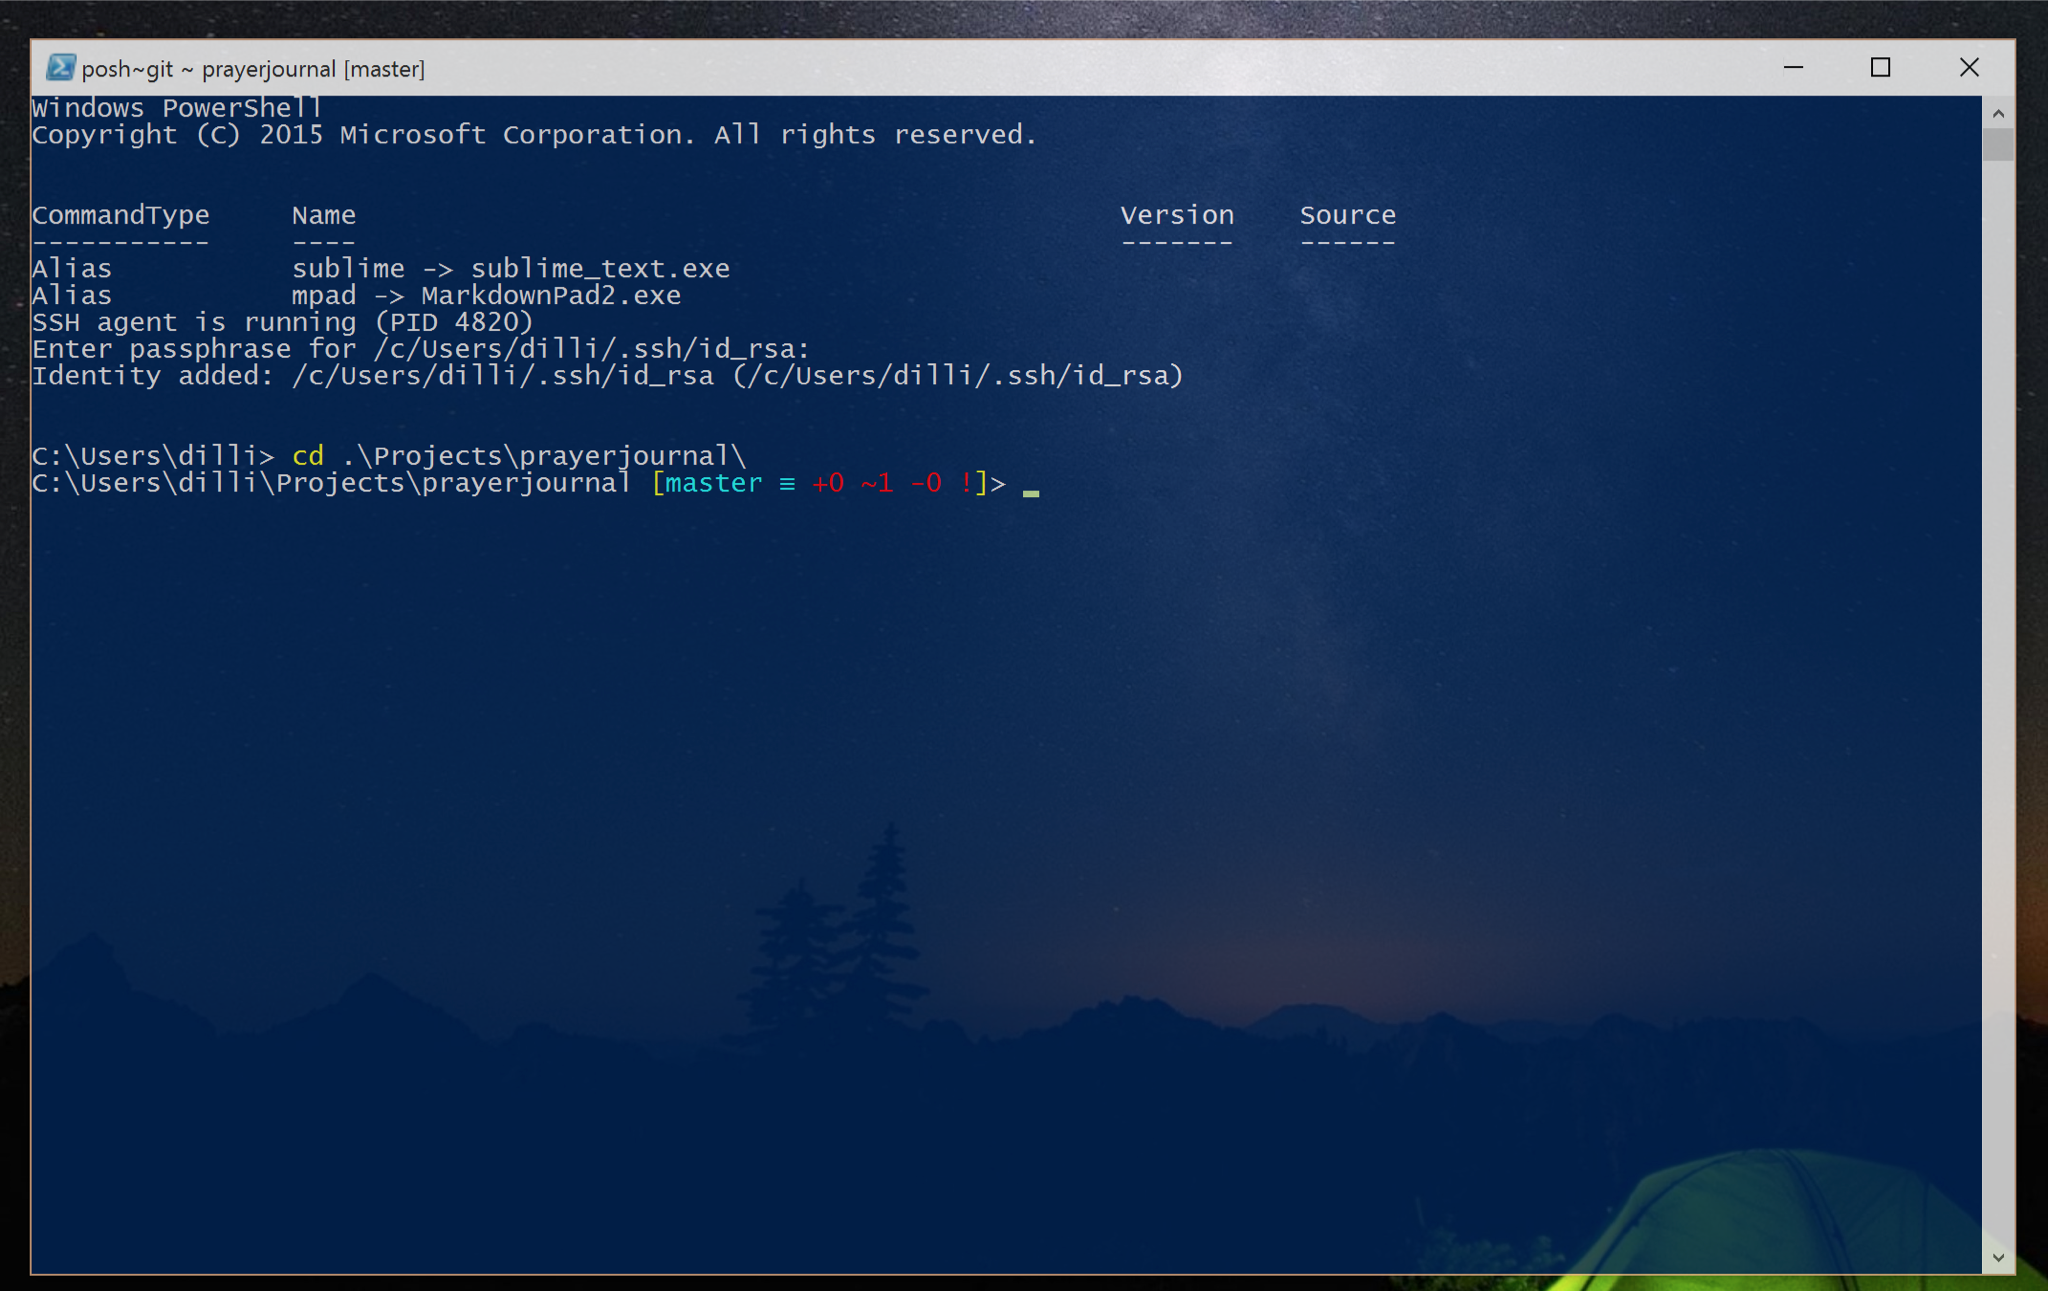
With all of these items in place, navigate to a folder that has a Git repository attached to it. You should see something like in the screenshot at the beginning of the post.
You’ll see that my SSH agent is running, my key has been verified, and when I go to the location of my project, I have a nice color coded layout which includes the branch I’m on, and any additions/modifications/deletions to the repository.
Enjoy! Let me know if you’re using any other tools for Git/SSH at the PowerShell prompt, I’m always looking for more!