As I’m working through my Prayer Odyssey project, I’m in the process of building native mobile apps, thanks to Xamarin. However, I hit a snag that was preventing me from testing things locally. For some reason I kept receiving timeout errors, when I could clearly see that the API was running. After a bit of digging (combined with a little hair pulling and head pounding), I tracked down the issue. The mobile app on the iOS simulator couldn’t connect to the API on a VMWare Fusion virtual machine. Here’s how you get this to work.
![]()
TLDR;
For those of you that like the “quick read” here’s the diagnosis. You need to get the IP address of your virtual machine and add it to your hosts file so that your mobile app knows where to connect. In addition, Windows Firewall has your standard HTTP ports blocked by default, so you need to open them up.
Connecting to the VM
When you setup Xamarin in Visual Studio you also configure a bridge tool that allows Visual Studio to deploy and debug code within the iOS Simulator. However, the simulator itself is unaware of this bridge and any kind of URLs (localhost, prayerodyssey.dev, etc) will be looking within the context of the host machine.
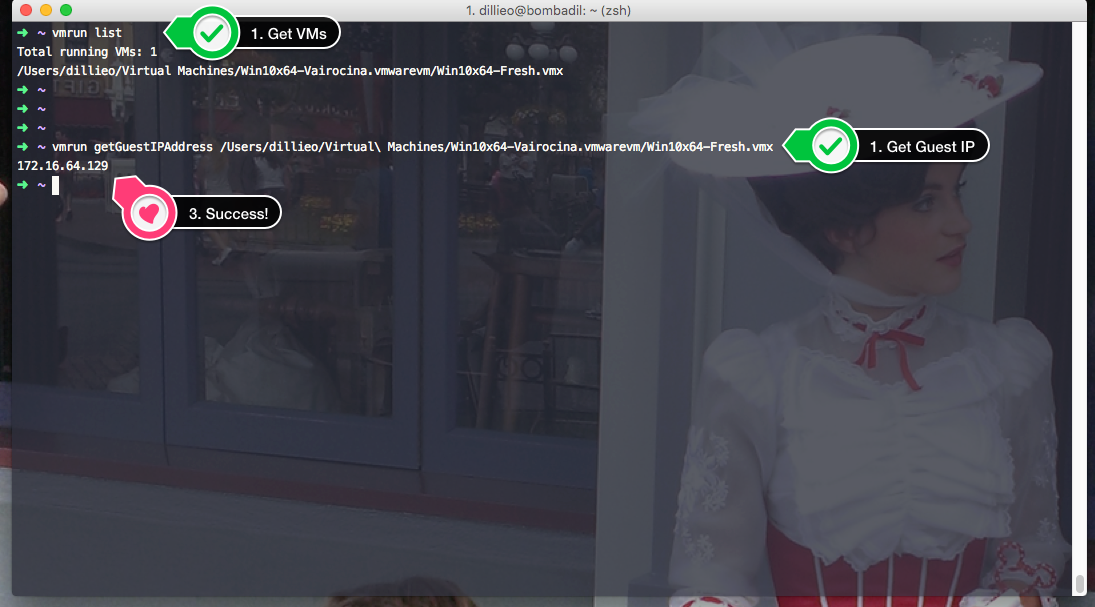
It’s not hard to connect to the VM, you just need the IP address of the virtual machine after it boots up. VMWare Fusion provides a handy tool named “vmrun” that is located in the /Applications/VMware\ Fusion.app/Contents/Library/ folder. If this location isn’t already in your path, you can easily add it, or provide an alias (which I’ve done) From there you can run the command...
vmrun list
...to get a list of the virtual machine running. Once you see your VM in the list, you can get the IP address by passing the name into the getGuestIPAddress command...
vmrun getGuestIPAddress [PATH_TO_VM]
Then you’ll see the IP address of your VM.
From here, simply update your hosts file to include the IP address and the URL of your API in your VM (api.prayerodyssey.dev), and you’re set. Are you still running your API out of localhost? You might want to reconfigure your web/api project to use a custom .dev domain name, which you can do by following these directions.
Open the VM Web Port
Sure you can ping your virtual machine now, but you’re still not getting to the API or website. The reason for this is that by default IIS Express is closed to external traffic. The next step is to add a firewall rule to allow inbound port 80 and 443 (in the event you’re testing SSL) traffic.
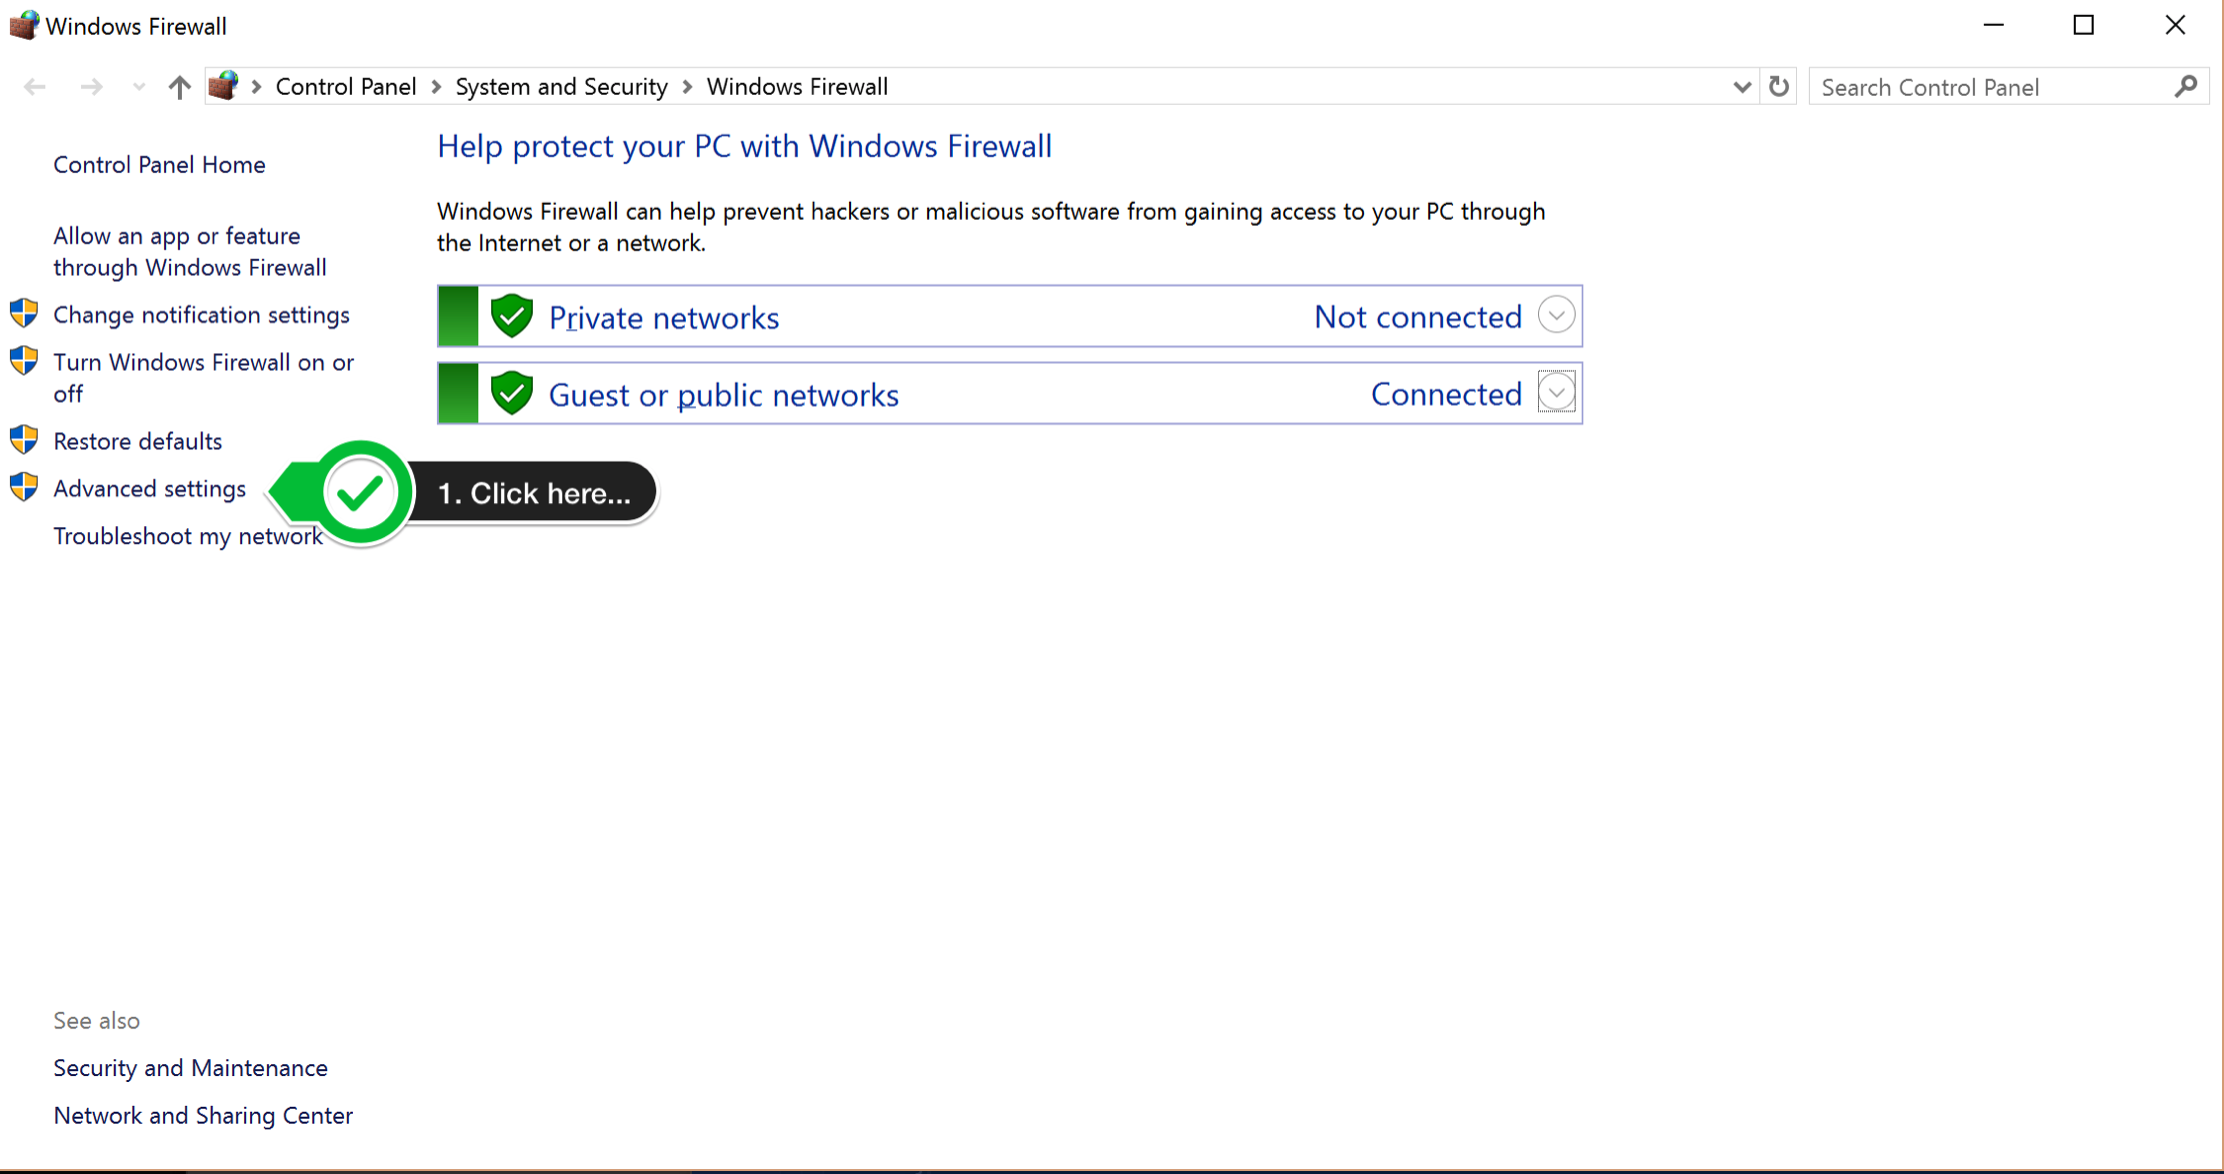
To start, open the Windows Firewall, and then select “Advanced Settings"
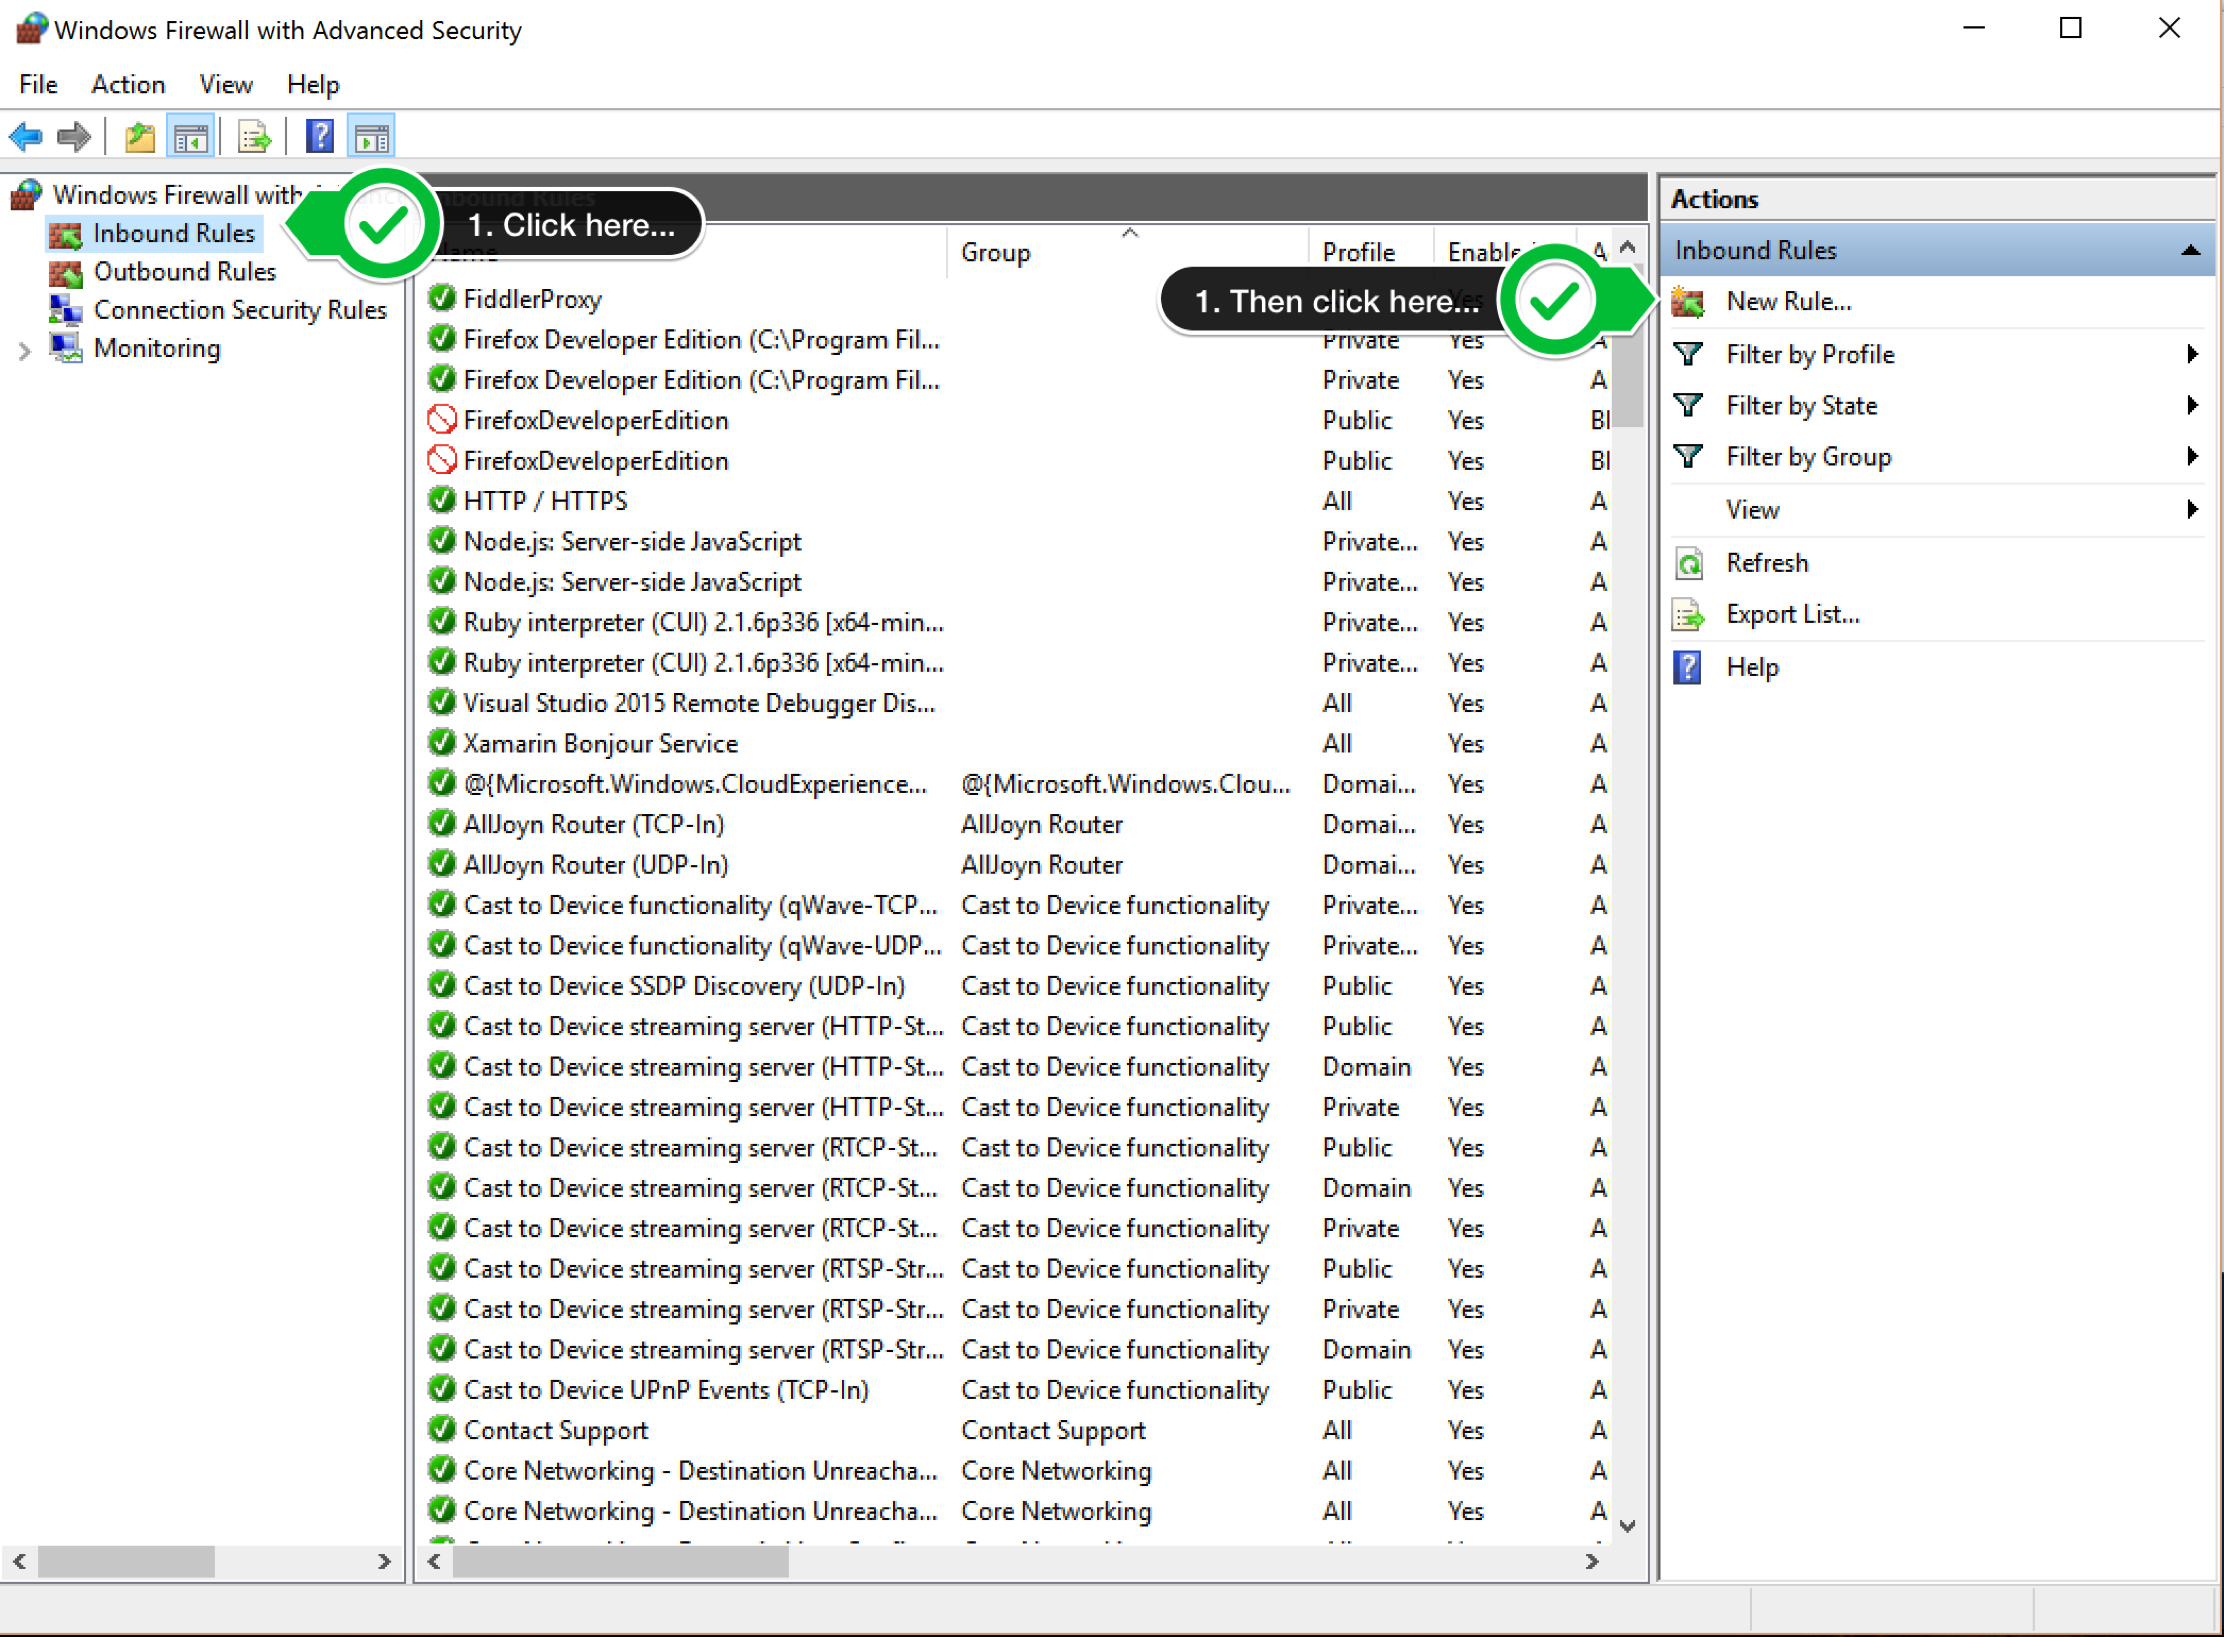
From there, select “Inbound Rules” on the left and then select “New Rule…” on the right
In the window that opens up, go through the following steps:
- Specify a new Port Rule
- Specify the TCP Port, select Specific Local Ports, then enter “80, 443” for the values.
- Specify “Allow the connection"
- For the profile, select all profiles you wish to enable. I have all of mine checked.
- Give the profile a name, such as “HTTP / HTTPS”
- Click Finish
Once that is done, you should be all set.
Test Away!
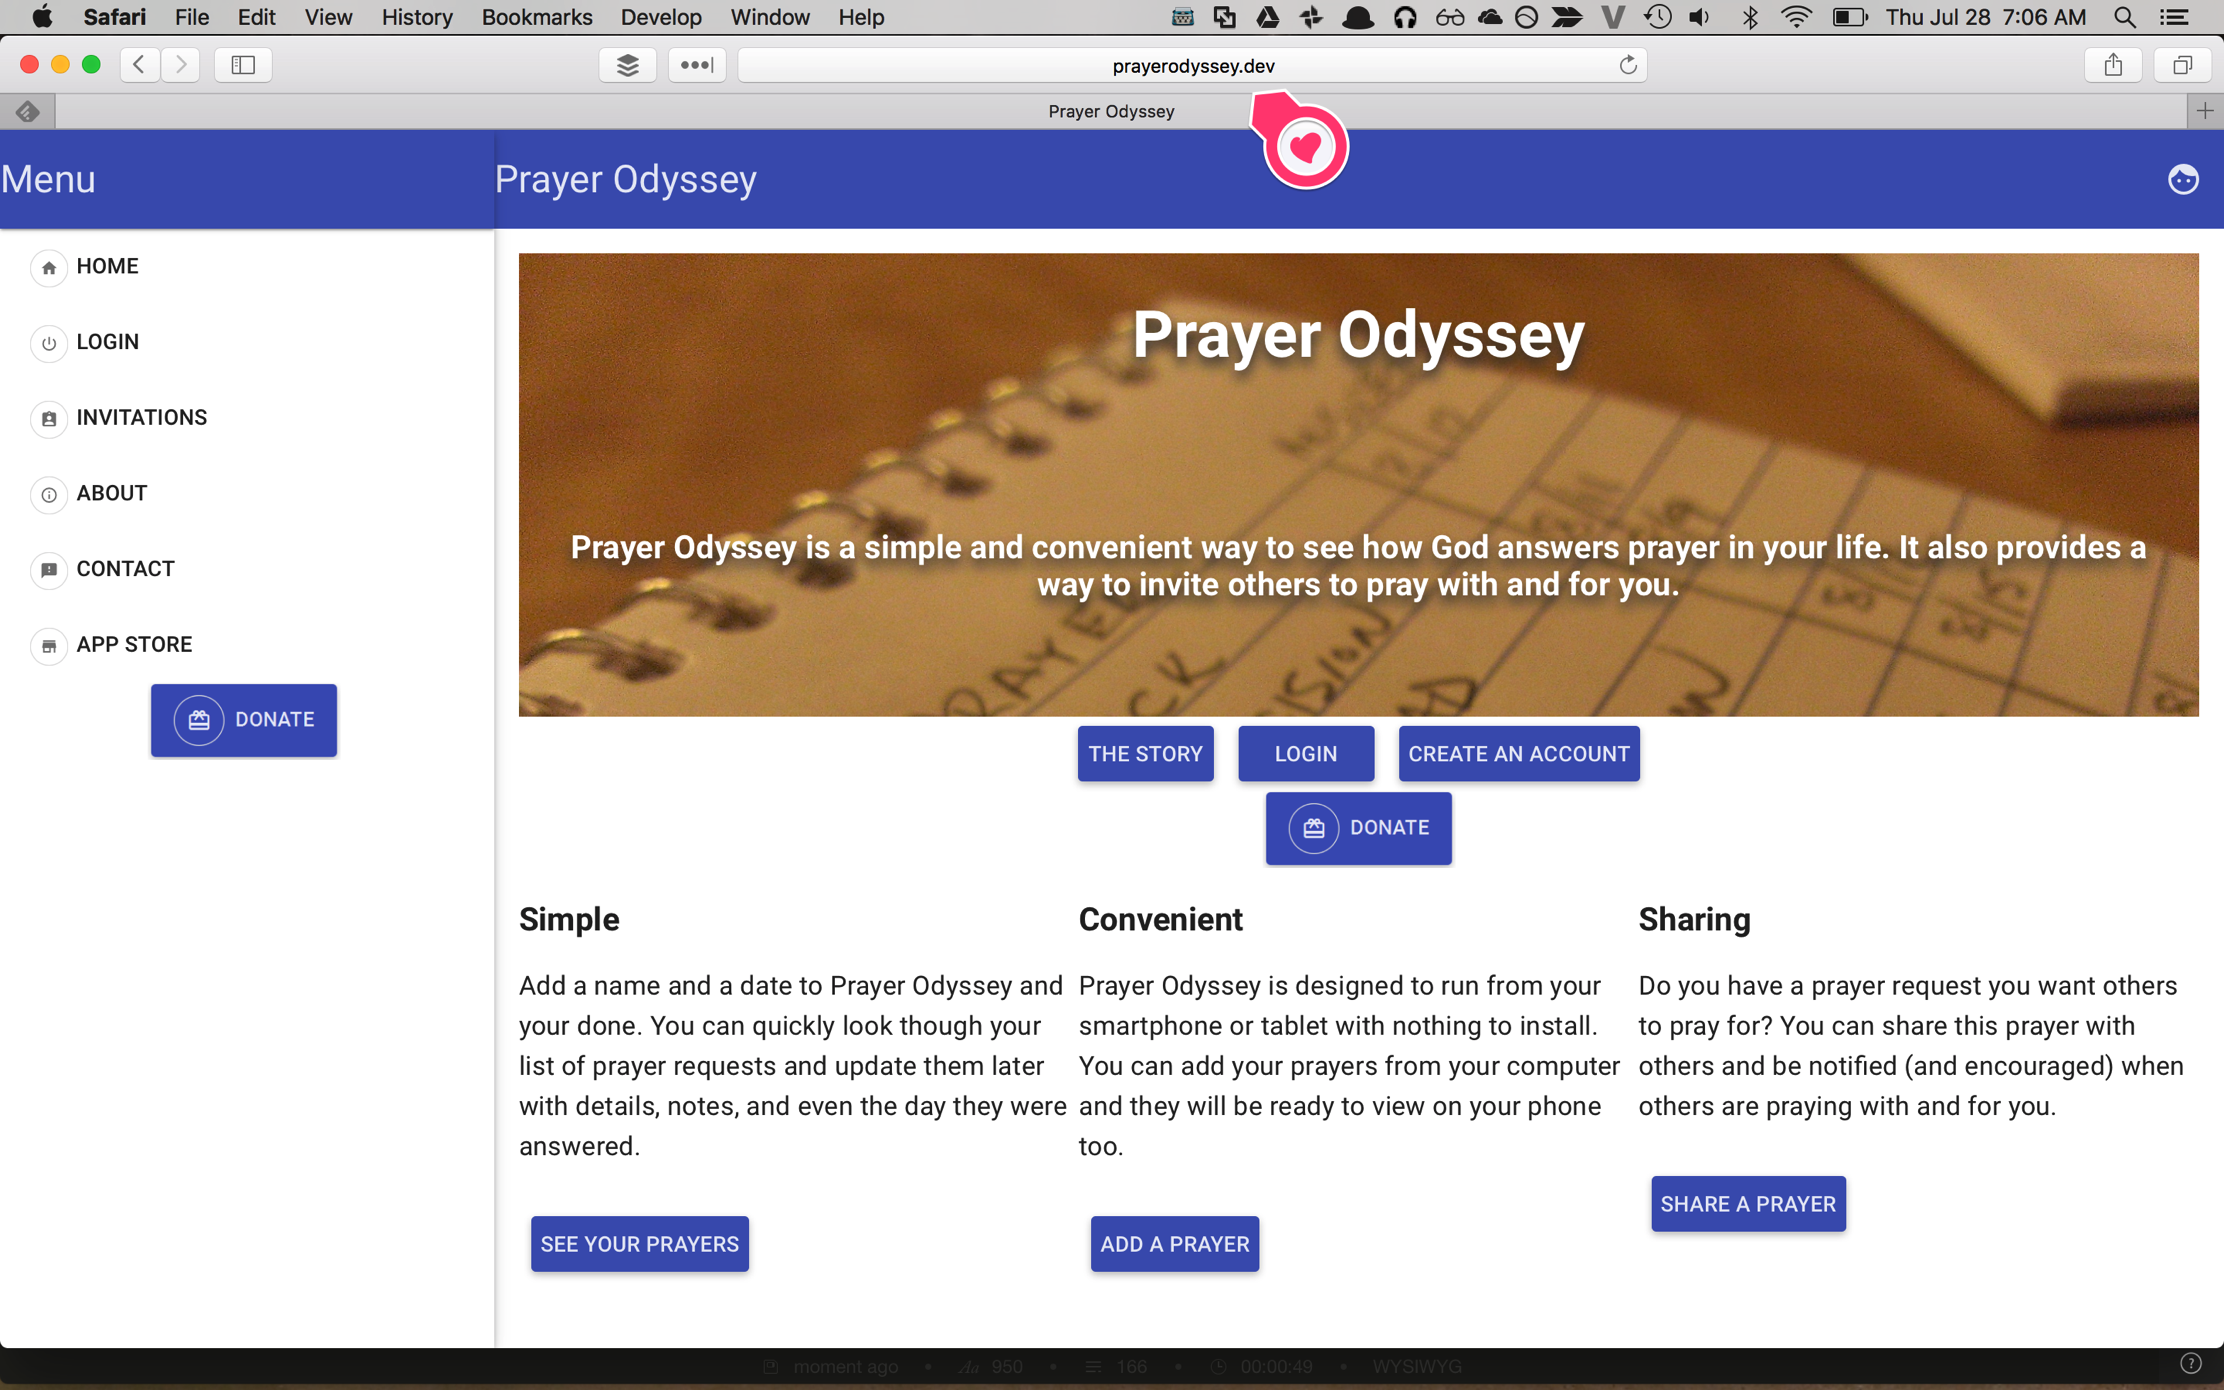
Now that we can direct our requests to the VM machine and we have the ports open, you can fire up your browser and check things are working.
Similarly, if you relaunch your mobile app in the iOS simulator, it’ll be able to connect to the API in your VM and work as intended.
Now go out and code! I hope this helps!